Key Takeaways
-
Replace O-rings and seals during condenser replacement to prevent refrigerant leaks; reusing old O-rings often causes leaks shortly after repair.
-
Proper vacuum evacuation is critical after installing a new condenser to remove air and moisture that corrode internal A/C components and reduce cooling efficiency.
-
Truck AC condenser replacement typically costs $500-$1,000+ and takes 1-4 hours depending on truck type; verify refrigerant type (R-134a vs HFO-1234yf) before service.
-
Common failure signs include warm air from vents, weak cooling, visible refrigerant leaks, and low refrigerant levels returning after recharging—get a professional diagnostic immediately.
-
Condensers cannot be reliably repaired when cracked or punctured; replacement is the only cost-effective solution for physical damage or leaks.
-
Schedule annual A/C inspections and keep debris away from the condenser to prevent corrosion and airflow restrictions, especially critical in humid climates like Tampa.
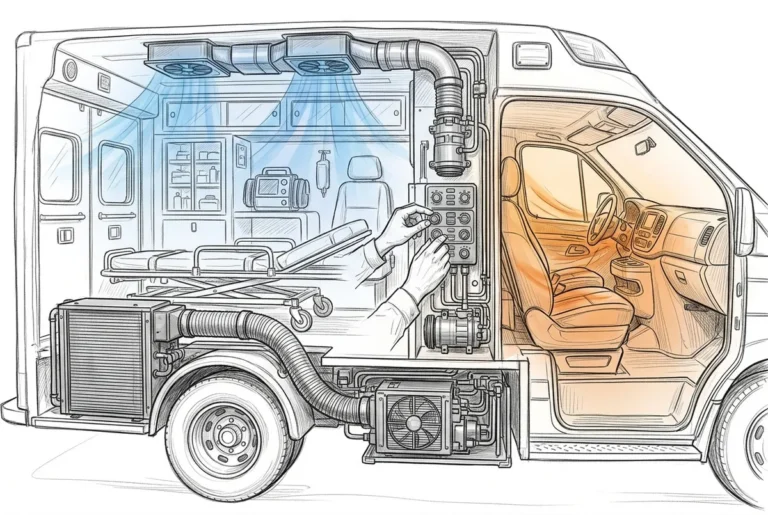
Your truck’s A/C system works hard — especially in Tampa’s intense heat. When the condenser fails, the whole system suffers. You might notice warm air blowing from the vents, poor cooling, or even refrigerant leaks. If that sounds familiar, you’re probably facing a truck AC condenser replacement. The good news? It’s a very fixable problem when handled by the right shop.
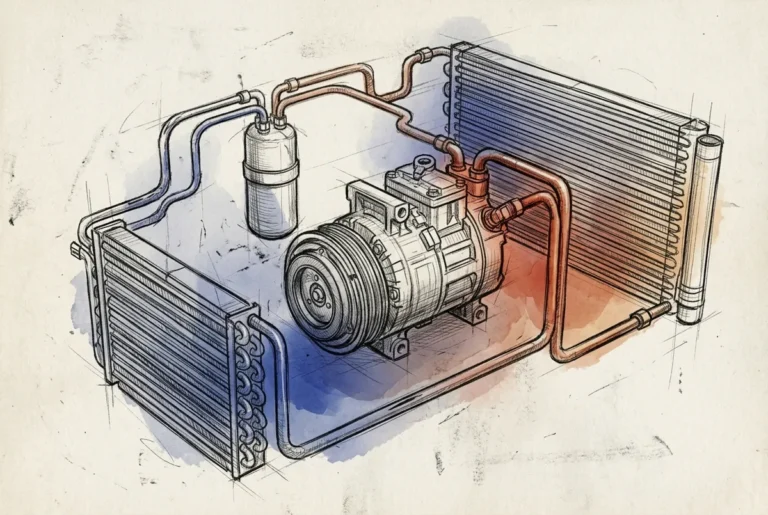
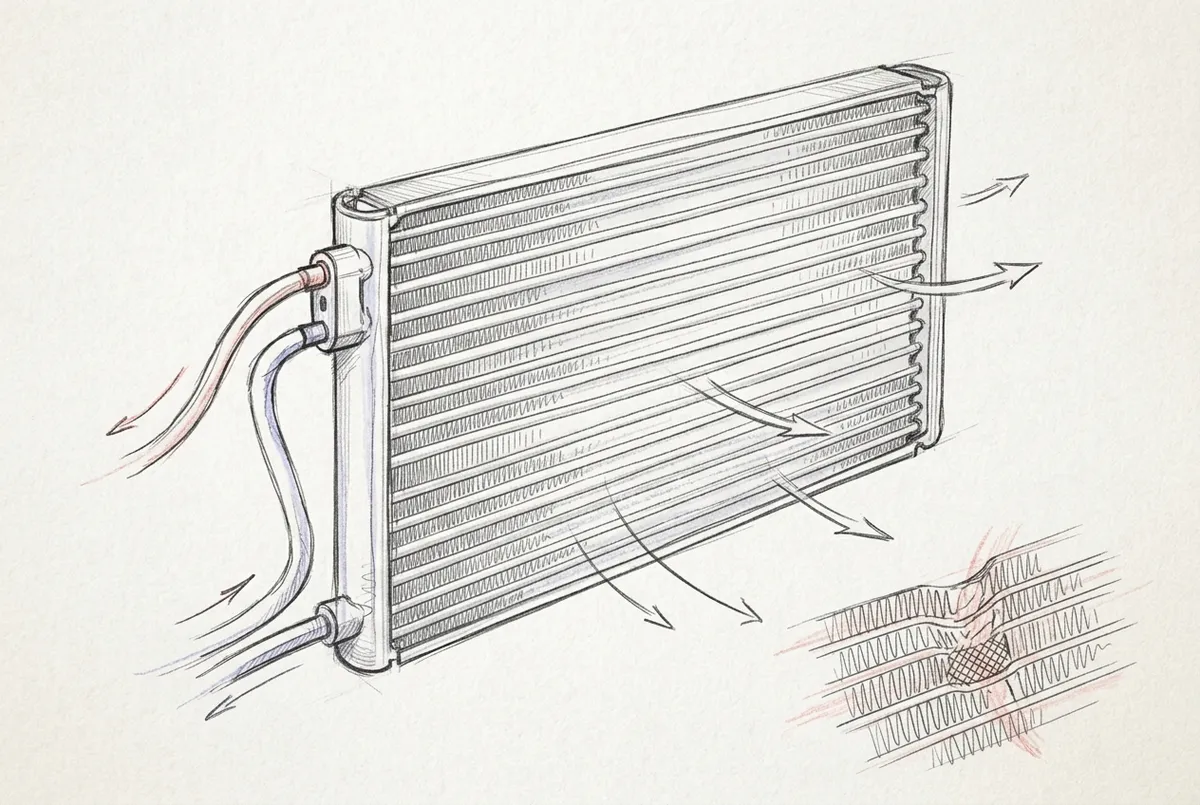
The condenser is one of the most important parts of your truck’s air conditioning system. It releases heat from the refrigerant to the outside air, keeping the cabin cool. When it’s damaged, cracked, or clogged, cooling performance drops fast. This is especially painful for truck drivers, fleet operators, and heavy equipment operators who spend long hours behind the wheel.
In this guide, we’ll walk you through the three key steps of a proper truck AC condenser replacement, share what to expect in terms of cost and time, and help you understand when it’s time to call in the pros. Let’s get into it!
What Is a Truck AC Condenser and Why Does It Fail?
Think of the condenser as your truck’s heat dumper. After the refrigerant absorbs cabin heat, it travels to the condenser — usually mounted at the front of the truck near the radiator — where that heat gets released into the outside air. Without a working condenser, your A/C system simply can’t cool properly.
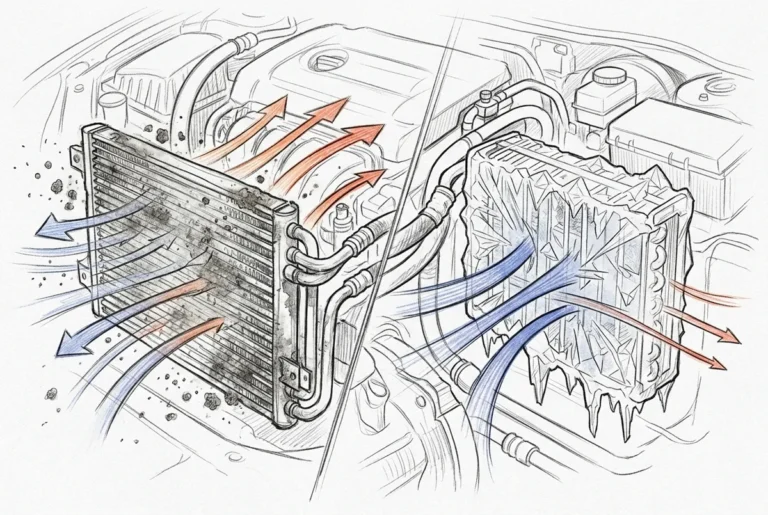
Condensers fail for several reasons. Road debris and rocks can puncture or crack them. Corrosion builds up over time, especially in humid climates like Tampa’s. Refrigerant leaks can develop from tiny cracks or failed O-rings. In some cases, heavy-duty trucks and equipment see condensers wear out faster due to vibration and harsh conditions.
Here are the most common signs your truck’s condenser needs attention:
- Warm or hot air blowing from the A/C vents
- A/C system that cools weakly or inconsistently
- Visible refrigerant leaks or oily spots near the condenser
- Unusual noises from the front of the engine bay
- A/C system that works briefly then blows warm air
- Low refrigerant levels that keep returning after recharging
If you’re seeing any of these signs, it’s worth getting a professional A/C diagnostic service right away. Catching it early can prevent bigger repairs down the road. You can also check out 10 reasons your AC is blowing warm air to narrow down the cause before your appointment.
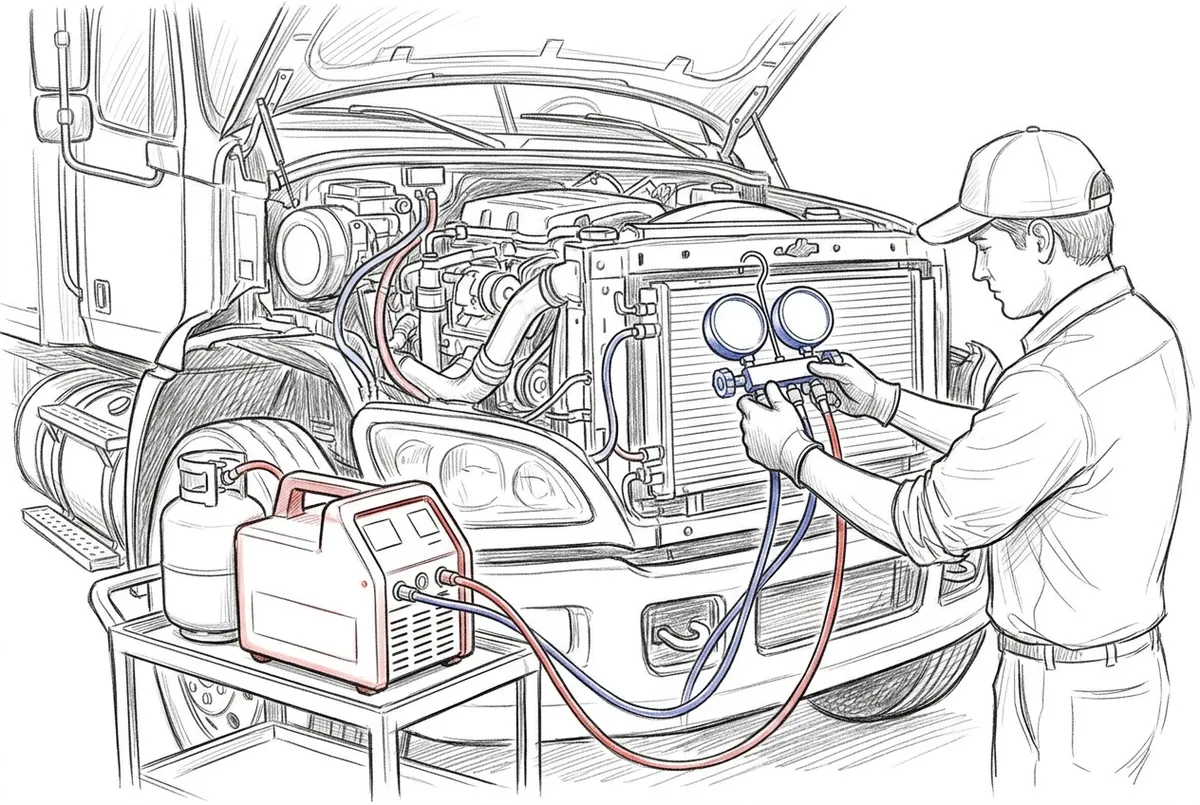
Step 1 — Refrigerant Recovery and System Preparation
The first step in any proper truck AC condenser replacement is refrigerant recovery. This is a non-negotiable part of the process. Releasing refrigerant into the atmosphere is illegal under EPA regulations, so a certified technician uses specialized equipment to safely capture it before any parts are removed.
At this stage, the technician will also inspect the rest of the A/C system. A failing condenser sometimes points to other issues — like a clogged receiver-drier or a damaged compressor. It’s much smarter (and more cost-effective) to identify all problems now rather than discover them after the new condenser is installed.
Here’s what happens during Step 1:
- Refrigerant recovery: A recovery machine captures all refrigerant from the system safely and legally.
- System inspection: The technician checks A/C lines, the compressor, and nearby components for any damage.
- Component disassembly: Parts in front of the condenser — like the radiator grille or cooling fans — are carefully removed to access the condenser.
Trucks and heavy-duty vehicles often have more components in the way, which adds some labor time compared to a typical passenger car. That’s normal. For fleet operators managing multiple vehicles, fleet vehicle A/C diagnostics can help streamline this entire process across your vehicles.
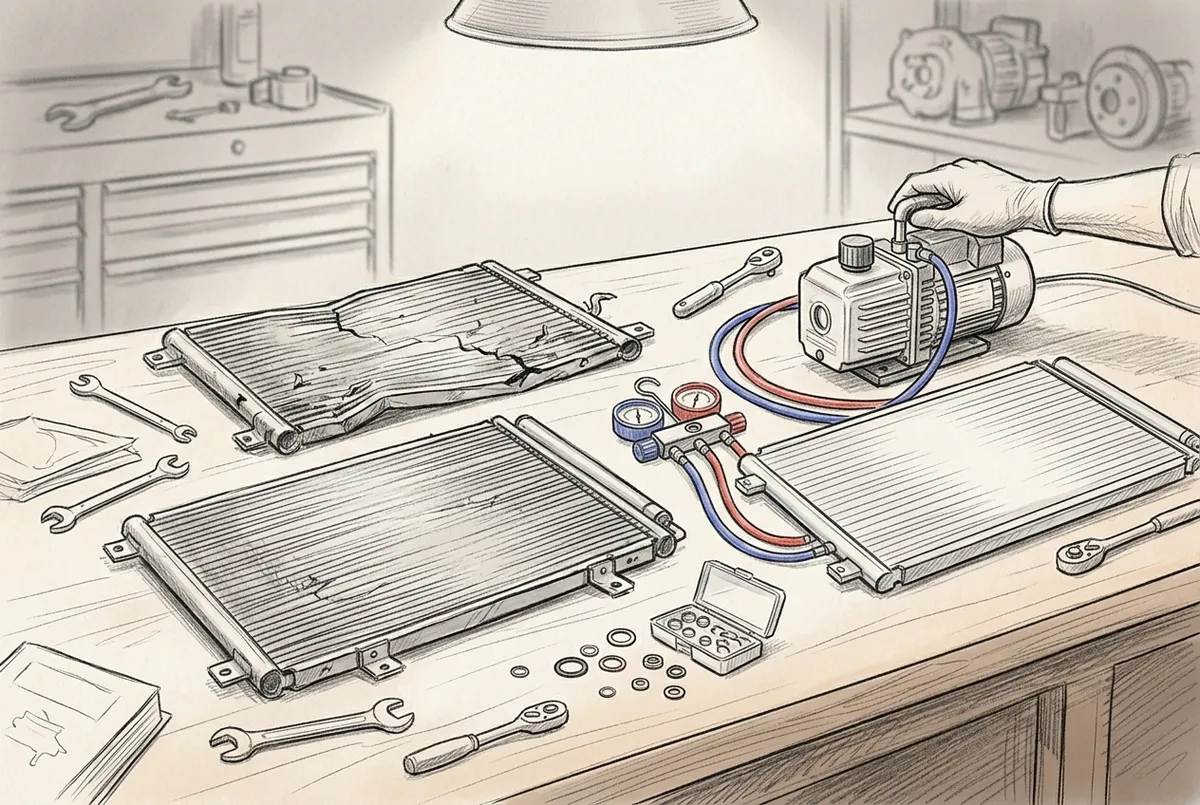
Step 2 — Removing the Old Condenser and Installing the New One
Once the system is depressurized and the surrounding components are out of the way, it’s time for the actual condenser swap. This is the heart of a truck AC condenser replacement, and getting it right requires both the right parts and careful attention to detail.
The old condenser is disconnected from the A/C lines, unbolted from its mounting brackets, and removed. At this point, the technician checks the A/C line fittings and connection points for damage. This is also the ideal time to replace the O-rings and line seals. These small rubber parts dry out and crack over time. If they’re reused, you’re likely to develop a refrigerant leak soon after the repair — and that means coming back for another service call. Fresh O-rings are cheap insurance.
Here’s what a quality condenser installation includes:
- Old condenser removal: Carefully disconnecting A/C lines and removing the damaged unit.
- O-ring and seal replacement: Installing new O-rings at every connection point, properly lubricated with refrigerant-compatible oil.
- New condenser installation: Securing the replacement condenser in the correct position and reconnecting all A/C lines snugly.
Parts quality matters a lot here. At Marks Air in Tampa, technicians work with trusted brands and carry a full inventory of A/C parts, including their own KOOL-TEMP parts line, so you’re not waiting days for a special order. Many truck jobs can be handled the same day because of this well-stocked inventory.
For more information on finding the right components, check out the most important commercial vehicle A/C parts to understand what goes into your system.
Step 3 — Vacuum Evacuation and System Recharge
This third step is where a lot of DIYers and inexperienced shops cut corners — and it can lead to serious problems. After installing the new condenser, the system must be properly evacuated under vacuum before any refrigerant is added back in.
Why does this matter so much? Because air and moisture trapped inside the A/C system are extremely damaging. Moisture reacts with refrigerant to form acids that corrode internal components. Air pockets reduce cooling efficiency and can cause pressure problems. A deep vacuum pulls all of that out before the system is sealed back up.
Here’s the proper sequence for Step 3:
- Connect vacuum pump: A professional-grade vacuum pump is attached to the A/C service ports.
- Evacuate the system: The pump runs long enough to remove all air and moisture — typically for a sustained period to reach deep vacuum levels.
- Vacuum hold test: The system is sealed and allowed to hold vacuum. Any pressure rise indicates a leak that must be found and fixed before proceeding.
- Refrigerant recharge: The correct type and amount of refrigerant is added per the truck manufacturer’s specifications.
- System performance check: Temperatures, pressures, and airflow are verified to confirm the A/C is working correctly.
Getting the refrigerant type right is especially important in 2026. Many newer trucks now use HFO-1234yf refrigerant instead of the older R-134a. If your truck has been converted or if you’re unsure what refrigerant it uses, check out 12 things to know about R-134a to 1234yf conversion before your service appointment.
How Much Does Truck AC Condenser Replacement Cost?
Let’s talk numbers. Cost varies based on the truck type, parts availability, and how much labor is involved. Here’s a general breakdown to give you a realistic picture:
| Cost Component | Estimated Range | Notes |
|---|---|---|
| Condenser Part | $200 – $600 | Varies by truck make and model |
| Labor | $200 – $400+ | 1–4 hours at shop rates |
| Refrigerant | Included or add-on | R-134a or HFO-1234yf |
| O-rings and Seals | $20 – $60 | Always recommended to replace |
| Total Estimate | $500 – $1,000+ | Heavy trucks may cost more |
According to RepairPal, the average A/C condenser replacement cost falls between $803 and $935, with labor between $281 and $412 and parts around $522. Heavy-duty trucks and commercial vehicles can push that total higher depending on the complexity of the job.
For a more detailed breakdown of what to expect, visit how much auto AC repair costs in 2026. It’s always best to get a quote after a proper diagnostic. You can also read about AC repair vs. AC replacement to understand your options before committing to a service.
Can a Truck AC Condenser Be Repaired Instead of Replaced?
In most cases, the answer is no — and here’s why. The condenser is a sealed heat-exchange component made of aluminum fins and tubes. When it’s cracked, punctured, or heavily corroded, there’s no reliable way to seal it that will hold up long-term under the pressure and vibration of a working A/C system. Attempting to repair it often just delays the inevitable.
The exception might be very minor blockages that can be cleared. But for actual physical damage or leaks, replacement is the right call. It’s more cost-effective in the long run and gives you a fully warranted, new component.
Here are a few other things to keep in mind:
- A damaged condenser is often caused by road debris — it’s not a maintenance failure, just bad luck
- Insurance may cover condenser damage if it resulted from a collision or road hazard — worth checking your policy
- Replacing a condenser is a good time to also service the receiver-drier, which filters moisture from the refrigerant
- Tampa’s humid environment accelerates condenser corrosion, so regular A/C inspections are especially important here
Marks Air has been helping Tampa truck owners, fleet operators, and heavy equipment crews with exactly these kinds of repairs since 1971. You can visit Marks Air on Google to see what customers in Tampa are saying about their service experience.
Tips to Avoid Future Condenser Problems
Once your new condenser is in, a little care goes a long way. Here are simple steps to protect your investment:
- Schedule annual A/C inspections — catching small leaks early prevents major repairs
- Keep the front of your truck clean — debris buildup around the condenser restricts airflow
- Watch for early warning signs — don’t ignore weak cooling or unusual smells from the vents
- Use a certified shop for refrigerant work — improper recharges cause more harm than good
- Check A/C performance at the start of each season — especially important for fleet vehicles and commercial trucks
For a complete checklist, check out 5 A/C maintenance tips every Tampa vehicle owner needs. And if you’re managing a fleet, fleet vehicle AC repair tips that save you money is worth a read too.
Marks Air is proud to be a member of the Mobile Air Climate Systems Association (MACS), which means their technicians stay current with the latest standards in mobile A/C repair and refrigerant handling. That’s the kind of expertise that protects your truck’s A/C system long-term.
Why Choose a Specialized A/C Shop for Your Truck
Not every general repair shop has the equipment or experience to handle a proper truck AC condenser replacement — especially for heavy-duty vehicles, transit buses, or specialized equipment. A shop that focuses exclusively on A/C systems brings a different level of knowledge and tooling to the job.
Specialized A/C shops understand the full system — not just the condenser, but the compressor, evaporator, expansion valve, hoses, and refrigerant. They’re less likely to miss a secondary issue that could cause a comeback repair. You can learn more about what a full-service A/C shop offers by visiting Marks Air’s A/C services page.
For truck drivers and fleet operators, downtime is money. A shop that stocks parts and can handle the full repair in one visit — including evacuation, recharge, and performance testing — is worth its weight in gold. You can also follow Marks Air on Facebook or check out their Yelp reviews to see how they’ve helped Tampa’s truck and fleet community stay cool year-round.
Conclusion — Keep Your Truck Cool with Confidence
A proper truck AC condenser replacement isn’t just about swapping one part for another. It’s a full-system service — refrigerant recovery, careful installation, O-ring replacement, vacuum evacuation, and a proper recharge. Every step matters for a repair that lasts.
Whether you’re a long-haul trucker, a fleet manager, or a heavy equipment operator working in Tampa’s heat, getting this repair done right the first time saves you time, money, and frustration. Don’t let a failing condenser keep you from staying comfortable on the job.
Ready to get your truck’s A/C back to full power? Schedule your service appointment with Marks Air today, or give us a ring at 813-988-1671 — our team is ready to help you stay cool all season long.
FAQs
Q: What are the signs that my truck’s AC condenser needs replacement?
A: Great question! The most common signs include warm air blowing from the vents, weak or inconsistent cooling, visible oily spots near the front of the engine bay, and low refrigerant levels that keep coming back after a recharge. If you’re noticing any of these, it’s time to have a certified A/C technician take a look before the problem gets bigger.
Q: How long does a truck AC condenser replacement take?
A: Most truck AC condenser replacements take anywhere from 1 to 4 hours, depending on the truck type and how much disassembly is needed to access the condenser. Heavy-duty trucks and commercial vehicles may take a bit longer. Shops with a good parts inventory — like Marks Air in Tampa — can often complete the full job, including vacuum evacuation and recharge, in the same visit.
Q: Do O-rings really need to be replaced during condenser replacement?
A: Yes, and it’s one of the most important details! O-rings seal the connections between A/C components, and they dry out and crack over time. If old O-rings are reused, there’s a good chance you’ll develop a refrigerant leak shortly after the repair. Replacing them is cheap compared to coming back for another service call — so always ask your technician to include fresh O-rings in the job.
Q: Why does the AC system need to be vacuumed after condenser replacement?
A: Vacuuming the system removes air and moisture before refrigerant is added back in. This is critical because moisture trapped inside reacts with refrigerant to form acids that damage A/C components over time. A proper vacuum hold test also confirms there are no remaining leaks in the system — making it one of the most important steps in any condenser replacement.
Q: Can I drive my truck with a damaged AC condenser?
A: Technically you can drive it, but it’s not a great idea — especially in Tampa’s heat! A damaged condenser means your A/C won’t cool properly, which can make long drives pretty uncomfortable. More importantly, a leaking condenser depletes your refrigerant, which can eventually cause the compressor to run dry and fail — turning a condenser replacement into a much more expensive repair. Get it looked at sooner rather than later!