Key Takeaways
-
Diagnose problems before purchasing parts — the most common mistake is assuming a failed compressor when the actual issue is often a $15 capacitor or clogged filter that costs far less to fix.
-
RV AC parts are not universal across brands and models — always confirm the brand, model number, part number, voltage, capacity, and refrigerant type before purchasing to avoid damage and safety risks.
-
Capacitors and fan motors are responsible for the majority of RV AC failures — test the capacitor first as it's the most common failure point and easiest to check before pursuing expensive repairs.
-
Never attempt refrigerant handling or leak repairs yourself — refrigerant work requires EPA 609 certification by law, and improper handling is dangerous; always hire certified technicians for sealed-system repairs.
-
Replace rather than repair aging systems — if your RV AC is over 10-15 years old, has multiple repairs in recent seasons, or has a failed compressor, replacement is often more cost-effective than continued repairs.
-
Modern RV ACs use complex digital control boards and thermostats that require professional diagnostics — attempting DIY repairs on these electronic components without proper tools can lead to costly misdiagnosis.
Your RV is your home on the road. Whether you’re parked at a Florida campground or crossing the country, a working air conditioner isn’t a luxury — it’s a necessity. But when your RV AC starts acting up, the temptation to grab the first replacement part you find can lead to costly mistakes. Choosing the wrong RV air conditioner repair parts or skipping proper diagnostics can turn a small fix into a big bill.
The good news? Most RV AC problems come down to a handful of common parts. And knowing the mistakes to avoid can save you time, money, and a lot of frustration. Whether you’re a seasoned road warrior or just getting into RV life, this guide is here to help you navigate repairs the right way. Let’s dive in!
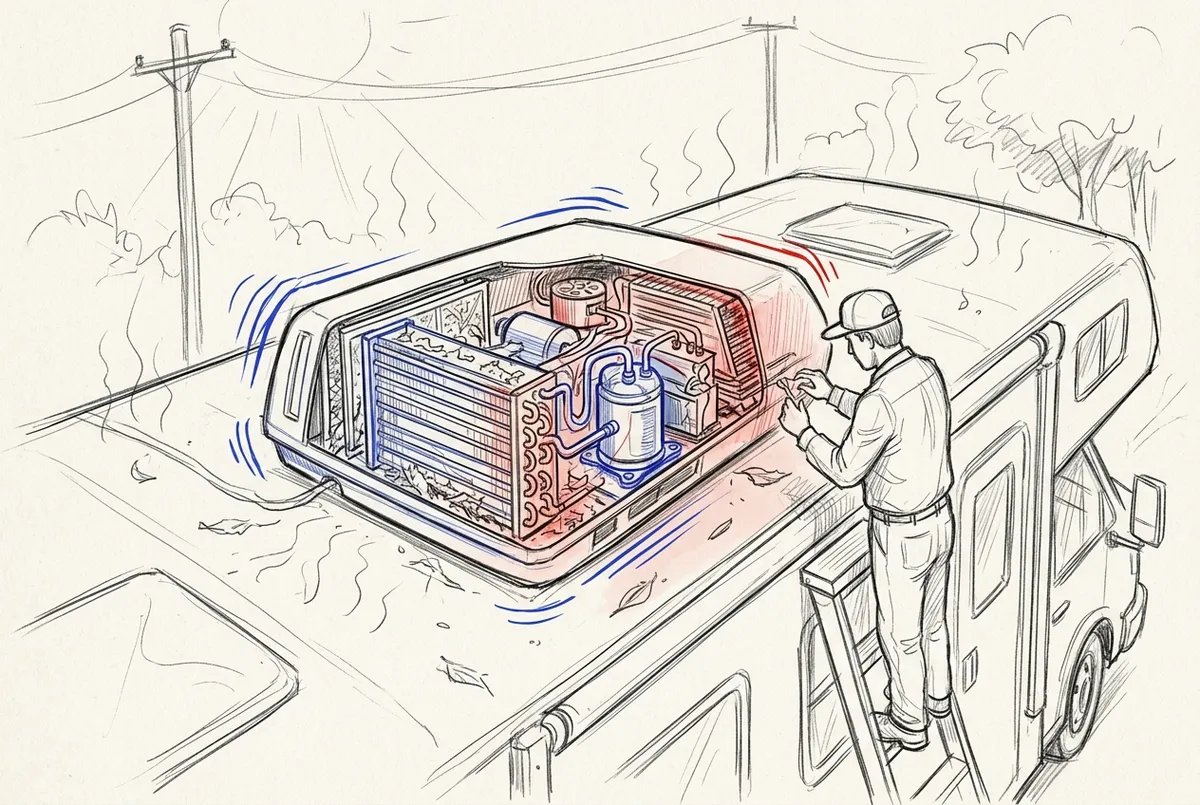
Why RV Air Conditioner Repairs Are More Common Than You Think
RV air conditioners work hard. They run in extreme heat, deal with road vibration, and often sit unused for months before being fired up again. It’s no wonder they need regular attention. According to industry data, the RV repair service market is projected to grow at a CAGR of 6.8% from 2025 to 2035, with HVAC systems being one of the most frequently serviced components.
The most commonly replaced parts in an RV AC unit include capacitors, fan motors, thermostats, air filters, and control boards. Compressor or sealed-system failures are less common but significantly more expensive. Knowing which part has failed — and getting the right replacement — makes all the difference. You can learn more about A/C parts for vehicles and RVs to get a better sense of what’s available.

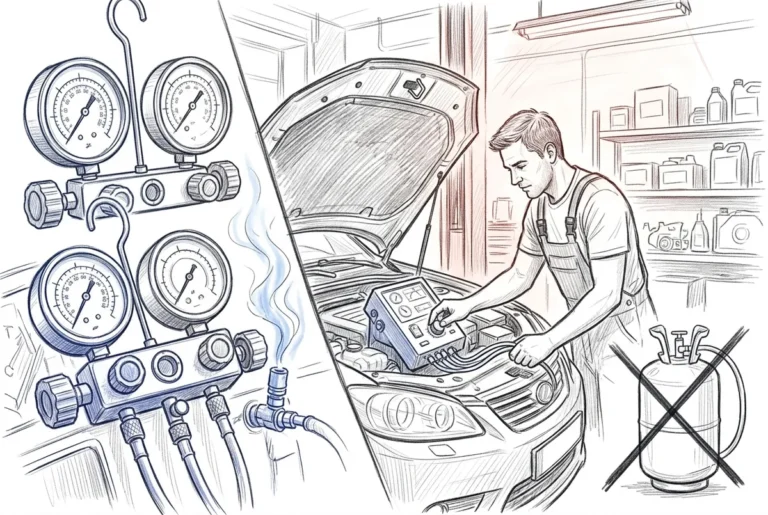
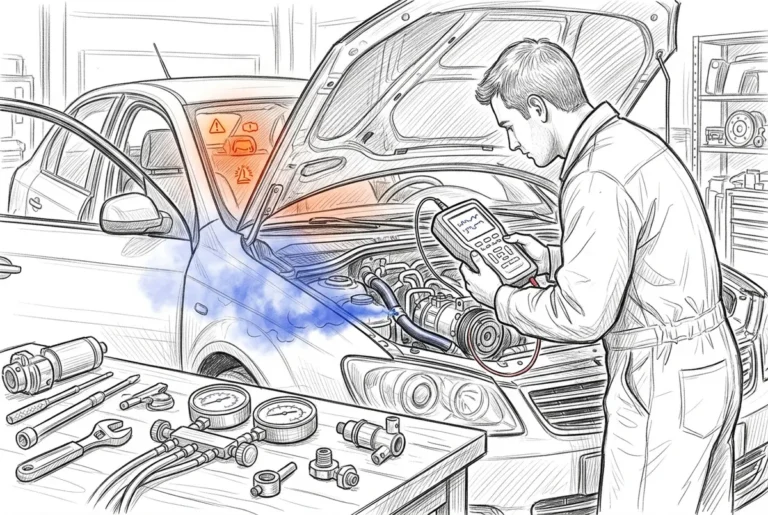
Mistake 1: Skipping a Proper Diagnosis Before Buying Parts
This is the number one mistake RV owners make. They notice warm air blowing and immediately assume it’s the compressor — then spend hundreds of dollars on a part they didn’t need. In reality, the problem might be a $15 capacitor or a clogged filter.
A proper diagnosis pinpoints the exact failure before any money is spent on parts. At professional A/C service centers, technicians use specialized tools to test electrical components, check refrigerant levels, and inspect system pressure. This step alone can save you significant money.
- Test the capacitor first — it’s the most common failure point and the easiest to check.
- Inspect the fan motor — listen for unusual noises or check for visible damage.
- Check the thermostat — a faulty thermostat can mimic compressor failure.
- Look at the air filter — a blocked filter restricts airflow and reduces cooling performance.
- Evaluate the control board — modern RV ACs rely heavily on electronic boards that can be tricky to diagnose without proper tools.
If you’re unsure where to start, reaching out to a trusted technician is always a smart move. You can also check out our FAQs page for quick answers to common A/C questions.
Mistake 2: Assuming RV AC Parts Are Universal
Not all RV air conditioners are built the same. Parts from one brand or model often do NOT fit another — even if they look identical. Using the wrong capacitor rating, an incompatible fan motor, or a mismatched control board can damage your system further or create safety risks.
Before purchasing any part, always confirm:
- The brand and model number of your RV AC unit
- The part number from your owner’s manual or existing component
- The correct voltage and capacity specifications
- Whether the part is OEM or a compatible aftermarket replacement
- The refrigerant type your system uses
When in doubt, speak with a parts specialist. The team at Marks Air in Tampa has been helping RV owners and technicians find the right parts since 1971. They stock a wide selection of A/C components and can help match the correct part to your specific unit.
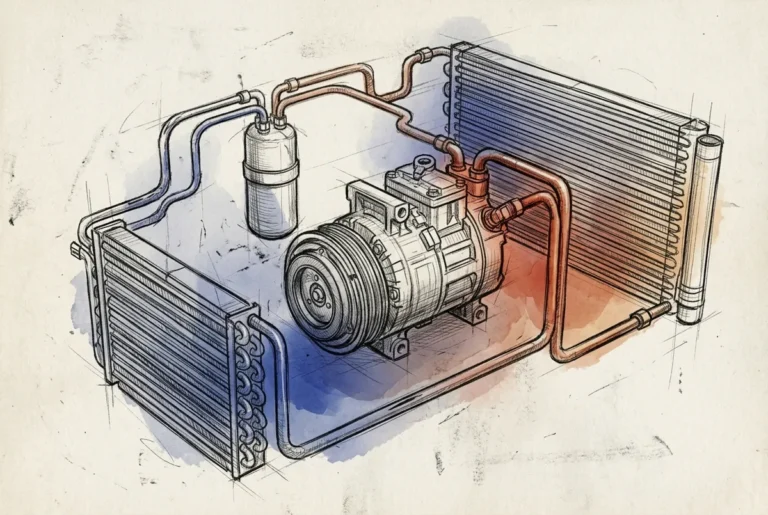
Mistake 3: Ignoring the Capacitor and Fan Motor
These two parts are responsible for a huge percentage of RV AC failures — yet they’re often overlooked. The capacitor starts and runs the compressor and fan motors. When it weakens or fails, the unit struggles to start or doesn’t cool properly. A bad fan motor means poor airflow and overheating.
Here’s a quick comparison of these two critical parts:
| Part | Function | Common Symptoms of Failure | Typical Repair Complexity |
|---|---|---|---|
| Capacitor | Starts/runs compressor and fan motors | Unit hums but won’t start, weak cooling | Low — often a straightforward swap |
| Fan Motor | Moves air across condenser and evaporator | No airflow, loud noises, overheating | Moderate — requires motor matching |
| Thermostat | Controls temperature settings | AC won’t turn on/off, wrong temp readings | Low to moderate |
| Control Board | Manages system functions electronically | Erratic behavior, no response to controls | High — requires proper diagnostics |
| Air Filter | Keeps airflow clean | Reduced airflow, poor cooling efficiency | Very low — simple replacement |
If your RV AC is blowing warm air, start with these parts before jumping to expensive repairs. You can also read more about 10 reasons your AC is blowing warm air and how to fix it for a deeper dive.
Mistake 4: Attempting Refrigerant Repairs Without Certification
This is a big one. Many RV owners assume they can top off refrigerant themselves using DIY kits. But refrigerant handling is heavily regulated for good reason. Improper handling can be dangerous and is often illegal without proper certification.
Refrigerant-related repairs — including leak detection, evacuation, and recharge — must be handled by certified technicians. This is especially true for newer systems that use HFO-1234yf refrigerant. If you’re curious about refrigerant certifications, check out our page on EPA 609 certification training mistakes to avoid.
- Never use DIY refrigerant kits on RV AC systems
- Always have leaks professionally diagnosed and repaired before recharging
- Refrigerant leaks don’t fix themselves — they get worse over time
- A certified technician can identify the leak source and recommend the right repair
For more on when to repair versus replace your system, take a look at our guide on AC repair vs. AC replacement.
Mistake 5: Overlooking Control Board and Thermostat Compatibility
Modern RV air conditioners increasingly rely on digital controls and electronic control boards. These systems are more efficient and feature-rich, but they also make diagnostics more challenging. Manufacturers don’t always publish complete troubleshooting data, which means guessing at control board issues can lead to costly misdiagnosis.
The difference between a thermostat and a control board is important to understand:
- The thermostat is the user-facing temperature controller — it tells the system what temperature to maintain.
- The control board is the brain of the unit — it processes signals and manages all system functions electronically.
- Both must be compatible with your specific RV AC model to work correctly.
When replacing either component, always use the part specified for your model. A professional technician with experience in RV systems can test these components accurately and recommend the correct replacement. To see what a fully equipped A/C service facility looks like, check out Marks Air’s A/C services.
You can also follow Marks Air on Facebook for tips, updates, and helpful information about vehicle and RV air conditioning.
Mistake 6: Waiting Too Long to Replace Instead of Repair
On the flip side, some RV owners go too far in the other direction — they keep repairing an old, failing system when replacement makes more financial sense. There’s a point where the cost of parts and labor outweighs the value of keeping the old unit running.
Here are some signs it might be time to replace your RV air conditioner rather than repair it:
- The unit is more than 10–15 years old
- You’ve had multiple major repairs in the past two seasons
- The compressor has failed (the most expensive repair)
- Replacement parts are no longer available for your model
- Efficiency has dropped significantly despite repairs
Not sure which path is right for you? Read our guide on AC repair vs. AC replacement to help make the decision easier. And if you want to know what other RV and vehicle owners think about professional A/C service, check out the Marks Air reviews on Yelp for real customer feedback.
How to Find the Right RV Air Conditioner Repair Parts
Finding the correct RV air conditioner repair parts doesn’t have to be a headache. Following a clear process makes all the difference.
- Identify your unit — Find the brand, model number, and serial number on the unit’s label.
- Diagnose before you buy — Confirm what’s actually failed before purchasing anything.
- Source OEM or quality aftermarket parts — Work with a reputable supplier that stocks trusted brands.
- Confirm specifications — Match voltage, capacity, and refrigerant type exactly.
- Use a professional for sealed-system repairs — Refrigerant work requires certification.
If you’re in the Tampa area and need parts fast, Marks Air carries an extensive inventory of A/C parts for vehicles, RVs, and heavy equipment, including same-day availability on many items. Their team can help you find exactly what you need without the guesswork. Marks Air is also a proud member of the Mobile Air Climate Systems Association (MACS), ensuring their parts and service meet current industry standards.
For more maintenance tips, check out our article on 5 A/C maintenance tips every Tampa vehicle owner needs.
Keep Your RV Cool and Your Wallet Happy
RV air conditioning repairs don’t have to be overwhelming. The key is avoiding these six common mistakes: skipping diagnosis, assuming parts are universal, ignoring capacitors and fan motors, attempting refrigerant work without certification, overlooking control board compatibility, and waiting too long to replace a failing unit.
Whether you’re a weekend camper or a full-time RV traveler, keeping your cooling system in top shape means more comfortable adventures and fewer unexpected breakdowns. And when you need expert help, the right team makes all the difference.
Visit us on Google — Marks Air to read what our customers have to say, then get in touch when you’re ready for professional RV A/C service or parts.
Ready to stop guessing and get your RV AC running right? Schedule your service appointment with Marks Air today — or give us a ring at 813-988-1671. We’re here to help you stay cool, wherever the road takes you.
FAQs
Q: What parts are most commonly replaced in an RV air conditioner?
A: Great question! The most frequently replaced RV AC parts are capacitors, fan motors, air filters, thermostats, and control boards. These components wear out over time due to heat, vibration, and regular use — and catching them early can save you a big repair bill down the road.
Q: Can I repair my RV air conditioner myself, or do I need a technician?
A: Some repairs — like replacing a filter or a basic thermostat — are manageable for handy RV owners. But anything involving refrigerant, control boards, or sealed systems really should be handled by a certified technician. It’s not just about skill — refrigerant handling is regulated by law and requires proper certification.
Q: Are RV air conditioner repair parts universal across all brands?
A: Unfortunately, no! RV AC parts are not universal. Each unit has specific requirements for voltage, capacity, and component compatibility. Always match the part number to your exact make and model before purchasing — using the wrong part can cause further damage or even create safety risks.
Q: How do I know if my RV AC capacitor or fan motor is bad?
A: A bad capacitor often causes the unit to hum without fully starting or cool poorly even when running. A failing fan motor may produce unusual noises, provide little to no airflow, or cause the system to overheat. If you notice these symptoms, it’s worth having a technician test both components before replacing anything.
Q: When should I replace my RV air conditioner instead of repairing it?
A: If your unit is more than 10–15 years old, has needed multiple major repairs recently, or has a failed compressor, replacement is often the smarter financial choice. It’s also worth replacing if parts for your model are no longer readily available — a specialist can help you weigh the repair vs. replace decision.